OES Ear Cleaning
Grooming OES Ears 101
by Dea Freiheit
Download a printable version of this article: Grooming_OES_Ears_101
Authors Note:
This article is not a replacement for veterinary care. If you have ANY questions about your OES' ear cleaning or general ear health, consult your veterinarian. I have opted to use the female gender in this article, but of course it applies to males too.
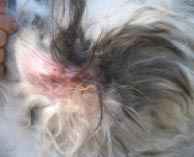
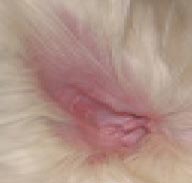
The key to maintaining healthy OES ears is to keep them clean and allow fresh air to circulate under the ear flap (also called the ear leather). If you have thick, matted hair under the ear flap or canal, you are promoting an environment for bacterial and/or fungal growth. If your dog's ears have a foul smell, are red on the inside, hot to the touch, or if your dog is scratching her head a lot, she probably has an ear infection. This can be caused by a yeast or bacterial infection. Dogs can also get ear mites, a parasite that lives in the ear wax. Definitely see your vet if your dog has any of these symptoms.
Grooming a sheepdog's ears can be a daunting undertaking. I am sure that if you ask ten different OES groomers, you will probably get ten different answers how to best groom your dog's ears. The following is the way I do it.
The first step in grooming a sheepdog's ear is to make sure that all the mats are removed from the ear flap (both sides) and the surrounding hair. This sounds easy, but the thin edges of the ear leather can tear easily. Be very careful when pulling mats apart in this area. I groom each side of the ear separately, first the back and then the inside. Never pull the mat apart toward the edge of the ear - like you would tear a piece of paper. I always start while the ear flap is lying flat. I start farthest from the head on the edge of the ear and work my way toward the ear leather. It is very important that as you pull the mats apart with your fingers and gently brush the hair, that you do not put pressure on the thin skin at the edge of the ear. Also be careful that your slicker brush does not scratch the skin. The area on the back side of the ear where it joins the head is a common place for mates, so double check that area. After all the mats are removed from the ear flap and surrounding area, it is time to work on the inside of the ear.
 Now is the time to get out the fancy ear products. I really like a powder called R-7 Ear Powder. I squirt a little of the powder in the ear and massage it around. This serves two purposes, the first to dry the ear out even further, and the second is to make it easier to remove the hair inside your dog's ear. Yes, you need to remove the hair inside the ear! I start with my fingers and pull all the hair I can reach. Your dog will not like this the first few times, and you may need help holding her still. I even remove some of the hair on the inside flap of the ear, close to the dog's head, as I believe this aids in air circulation. This would be the thin wispy hair, not the thick hair at the edge of the ear. Pull as much of the hair from the inside of the ear with your fingers as you can - the name of the game here is ventilation. If you cannot reach the hair deep in the ear canal with your fingers, you can use hemostats. HOWEVER, you are now putting a hard metal object in your dog's ears, and you can SERIOUSLY injure your dog if she wiggles while they are in there. You can also inadvertently pull the skin of the ear along with the hair, if you are not careful. I recommend that novices have their vets show them the proper use of hemostats prior to using them at home.
Often, when you remove the hair from inside the ear, there will be a thick, dark brown waxy substance on it. It is important to remove all traces of this.
My veterinarian of over 30 years told me there are two basic thoughts on ear cleaning. The first is never get the inside of the ear wet, and the other is to wash the inside. He believes in washing the inside of the dog's ear, so that is what I do. My vet's belief is that a clean ear is a healthy ear.
Again, if you have ANY questions consult your own vet. I carefully hold my dogs head with the ear flap down and her nose pointed down, so that the water will run right out of the ear. Using my shower attachment, I gently spray warm water in the ear. I then use a very gentle soap and wash my dog's ear. I do not allow the soap to go deep in the ear, and I do not massage the soap in. I do not recommend the use of alcohol or hydrogen peroxide for cleaning the inside of the ears. Then I thoroughly rinse the ear, again making sure that the water runs out of the ear - not in. I then take a soft towel around my finger and dry the inside of the dog's ear, making sure not to jab my finger in too far. I then put a pH alkalinizing solution in the ear. I use a product called Triz-EDTA.
The next step is to put my dog on the grooming table, lying her on her side with the freshly washed ear up and ear leather back. I dry all the hair on the ear flap and the surrounding area. I now pay attention to the inside portion.
After using a towel and a cool dryer, I make sure that the ear is dry inside. I don't use Q-Tips to do this, just my finger and a soft towel. If you do elect to use Q-Tips, make sure you only use them on the outer part, DO NOT put them into the part of the ear you can't see. You can seriously injure your dog's ear by doing so. Your dog's ear should be shiny clean and dry before you proceed.
 Your OES now has clean ears. She will be delighted to get off the table and accept a healthy treat to reward her for all her good behavior while on the table!
I check my guy's ears every week when I groom them out. If I notice excessive hair, or dirt, I follow the above procedure. Prevention is the key to good ear health.
I would like to reiterate – if you notice ANYTHING suspicious about your dog's ears – take them to a vet right away. Early, proper treatment can prevent a relatively easy to deal with situation from becoming a painful, serious infection.
Your dog will have clean, healthy ears if you make her ears part of your grooming routine!
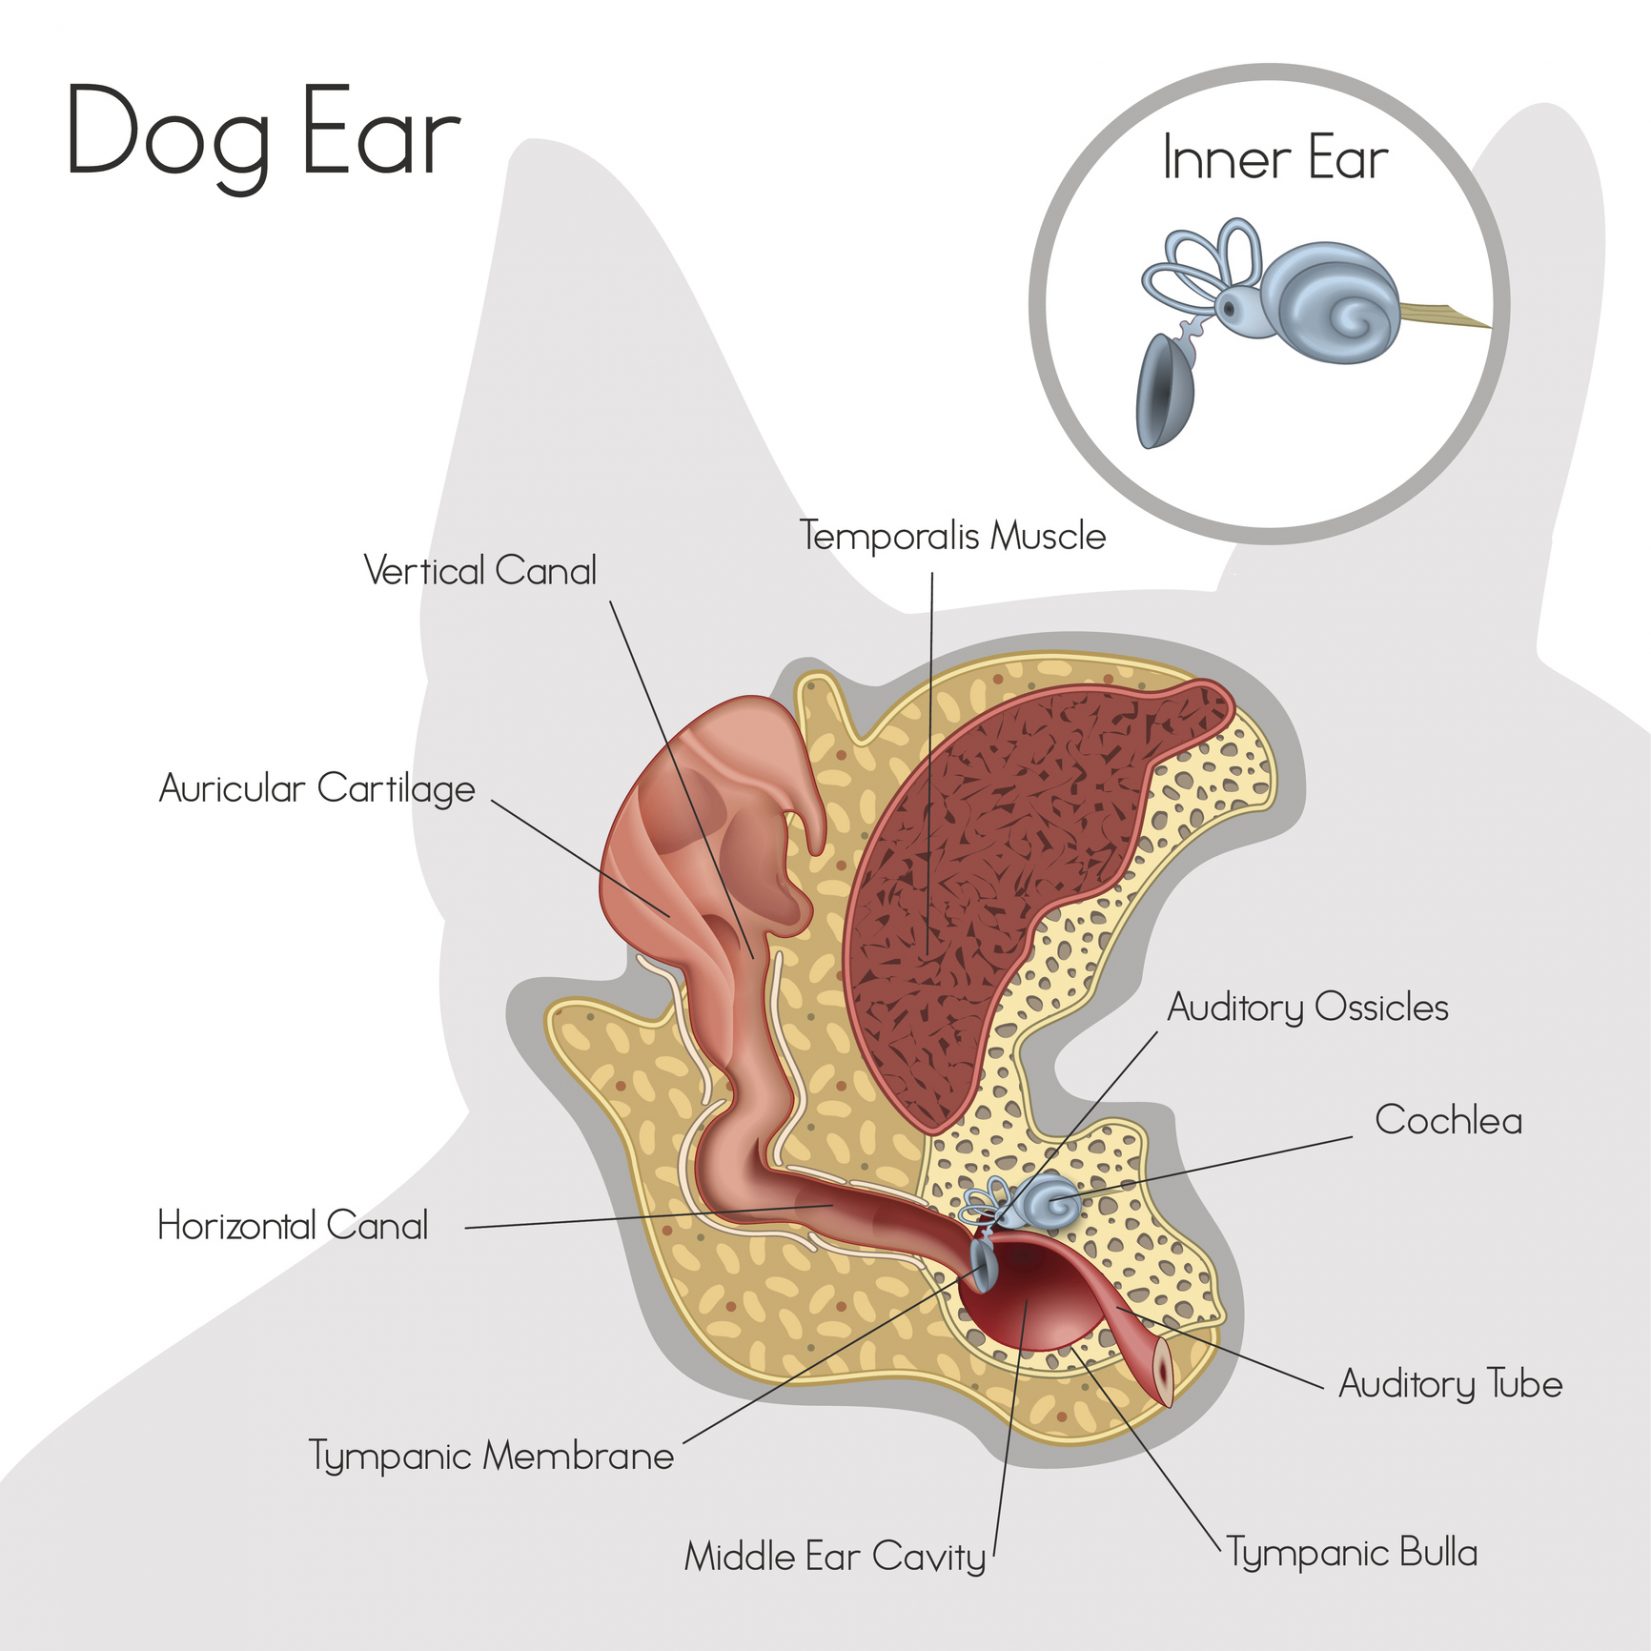
Dog Ear Anatomy
- Vertical Canal

- Horizontal Canal
- Auricular Cartilage
- Ossicles
- Labyrinth of Inner Ear
- Middle Ear
- Eustachian Tube
- Tympanic Bulla
- Tympanic Membrane
- Annular Cartilage